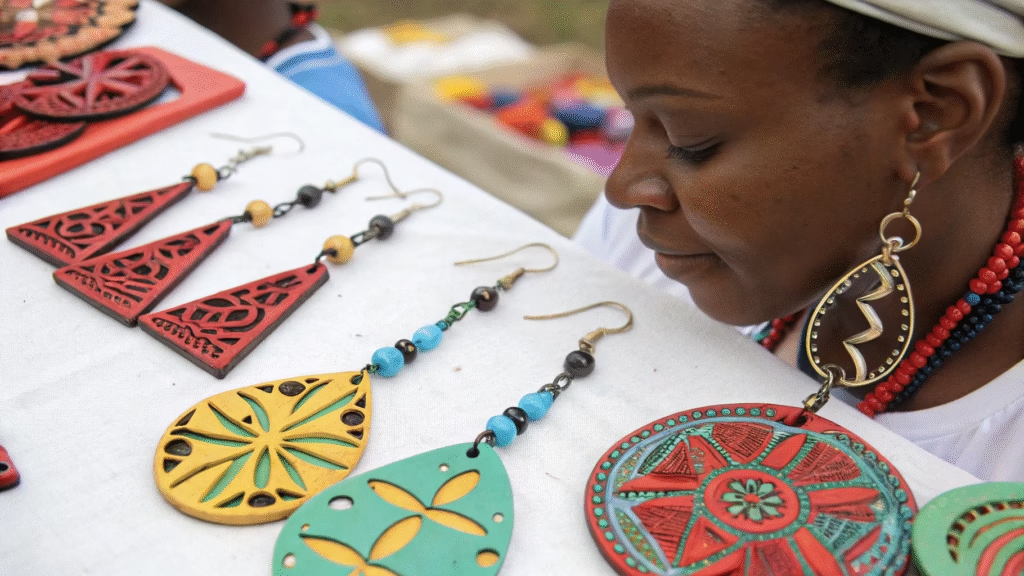
14+ Creative Air Dry Clay Earrings Ideas
Air dry clay earrings are lightweight, versatile, and easy to craft at home.
With just a bit of clay and creativity, you can design earrings that look unique and stylish without needing a kiln.
Why Air Dry Clay Earrings Are the Perfect DIY Jewellery Project
Air dry clay earrings have become one of the most popular handmade jewellery projects for very good reasons. They sit at the intersection of accessible craft and genuinely wearable art — the kind of project that looks impressive in the finished result but requires no specialist equipment, no kiln, no professional training, and very little investment to get started. A small block of air dry clay, a handful of basic tools, and a few hours is genuinely all that stands between you and a set of earrings that looks like something from an independent jewellery boutique.
The appeal also comes from what air dry clay earrings represent as a wearable object. Unlike bought jewellery, a pair of handmade clay earrings carries visible individuality — in the exact shape, the colour mix, the painted finish, the slight irregularity that marks them as made by a specific person at a specific moment. This is increasingly valued in a fashion landscape dominated by mass production, and it explains why handmade clay earrings consistently attract attention and compliments when worn. People notice the difference between something manufactured and something made.
From a practical standpoint, air dry clay is also one of the most beginner-friendly jewellery materials available. It is soft and workable straight out of the packet, dries without any heat source, accepts acrylic paint and sealants beautifully, and is light enough when dry that even large statement earrings sit comfortably without pulling. Mistakes can be smoothed out while the clay is still wet, dried pieces can be sanded and refined, and the entire process from rolling out clay to wearing the finished earrings can happen in a single afternoon.
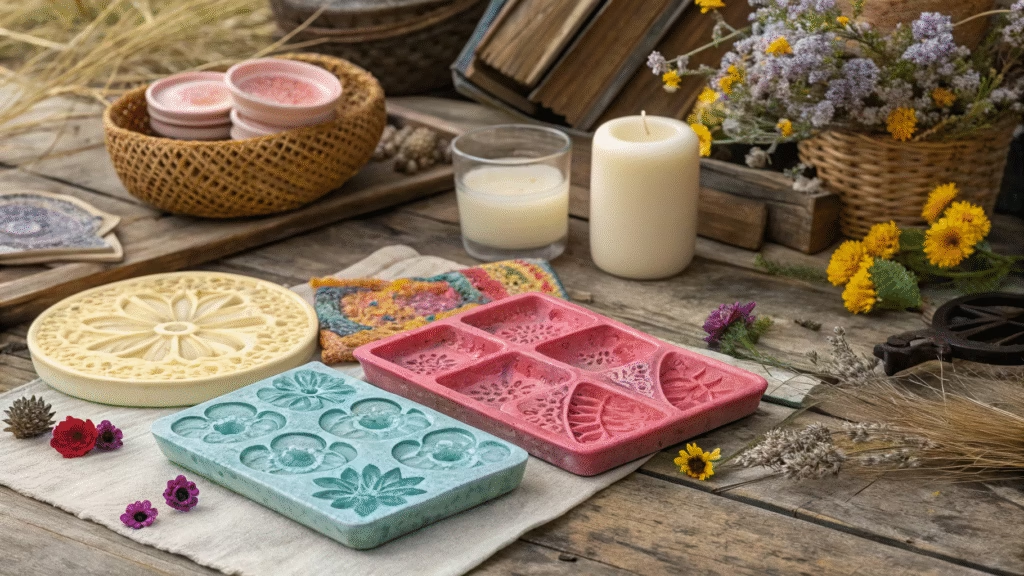
What Supplies You Need to Make Air Dry Clay Earrings at Home
One of the most accessible things about this project is how minimal the supply list really is. You can produce beautiful, polished-looking air dry clay earrings with a very small collection of tools and materials, most of which are either already at home or available affordably at any craft store.
Air dry clay itself is the starting point, and not all varieties are equal for earring making. White air dry clay is the most versatile base because it takes paint evenly and shows colours accurately. Avoid very cheap air dry clays that crack heavily during drying — brands like DAS, Crayola Model Magic, and La Doll are all reliable and widely available. For earrings specifically, you want a clay that dries to a relatively hard, durable finish and does not become excessively brittle. Thinner pieces like circle studs and leaf shapes are the most vulnerable to cracking, so rolling to an even thickness of at least 3 to 4mm is worth the extra care.
For shaping, a smooth rolling pin or a glass jar works perfectly to roll the clay to an even thickness. Cookie cutters, craft knife blades, and clay cutters in geometric shapes are ideal for clean edges. For organic and abstract shapes, your hands and a clay tool or toothpick are sufficient. Before the clay dries, pierce a small hole at the top of each earring piece using a toothpick, cocktail stick, or pin — this is where the earring hook or jump ring will attach once everything is dry and finished.
For finishing, acrylic paint in your chosen colours, fine detail brushes, a flat brush for base coats, and a clear sealant varnish are the essentials. The sealant step is not optional — air dry clay is porous and without a protective coat it will absorb moisture and eventually soften or degrade. A gloss or matte acrylic sealant sprayed or brushed over the fully painted and dried earrings locks in the colour and protects the surface. Earring hooks, jump rings, and flat-back stud posts with adhesive pads complete the hardware side and are all available in packs from craft stores at very low cost.
How to Get a Professional Finish on Handmade Air Dry Clay Earrings
The difference between air dry clay earrings that look genuinely polished and ones that look obviously beginner-made usually comes down to a few finishing techniques rather than the designs themselves. The good news is that these techniques are all simple and learnable, and applying even two or three of them consistently will elevate your results significantly.
The most important step is sanding. Once your clay pieces are fully dry which typically takes 24 to 48 hours depending on thickness and ambient humidity — lightly sanding the surfaces and edges with fine grit sandpaper (around 400 grit) smooths any cracks, fingerprints, or uneven texture from the drying process. This takes only a minute per piece and makes a dramatic difference to how cleanly paint applies and how finished the final earring looks. It is the step most beginners skip and the one that most improves results.
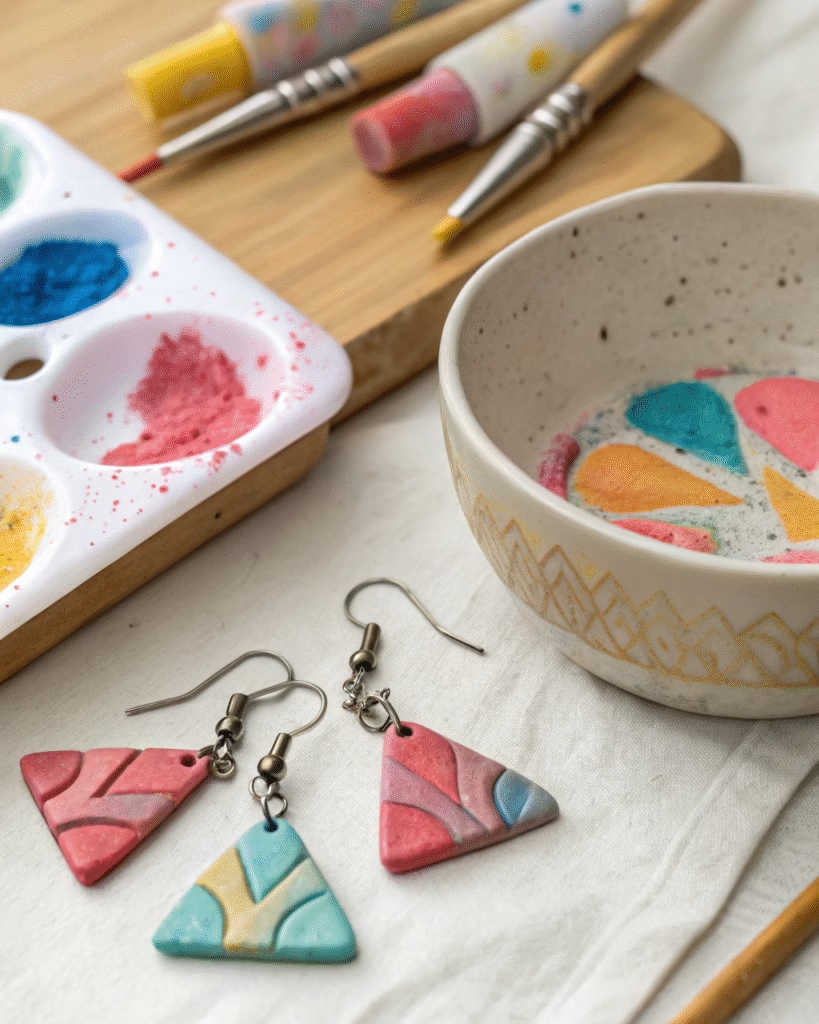
Painting technique matters almost as much as sanding. Apply a thin base coat first and allow it to dry completely before adding a second coat rather than trying to achieve full coverage in one thick application. Thick paint tends to crack or peel on clay surfaces, especially on pieces that flex slightly during wear. Two thin coats will always look smoother and more professional than one heavy one. For detailed designs like painted statement earrings or metallic-tipped styles, use a very small liner brush with a steady hand and keep a cocktail stick nearby to clean up edges while the paint is still wet.
Finally, sealing evenly and thoroughly is what determines the longevity of the earrings. Apply two thin coats of varnish rather than one thick coat, allowing the first to dry completely before adding the second. Pay attention to the edges and back of each piece as well as the front — these areas are often missed and are the first places moisture will penetrate if left unsealed. For earrings you plan to wear frequently or gift to someone else, a resin top coat applied over the varnish gives the strongest and most durable finish, bringing the surface to a glass-like clarity that looks genuinely professional.
Here are 14+ fun and creative ideas to get you started.
1. Minimal Circle Studs
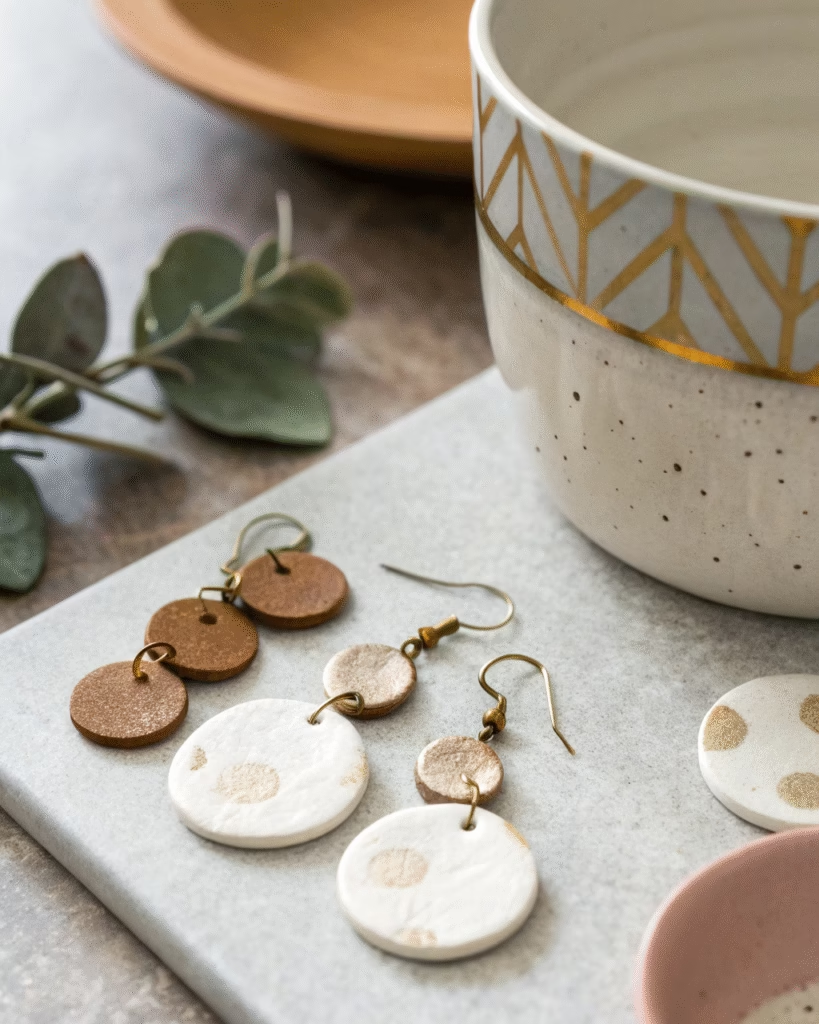
Shape small clay circles for simple everyday studs. Paint them in neutral or metallic tones for a chic touch.
2. Marbled Drop Earrings
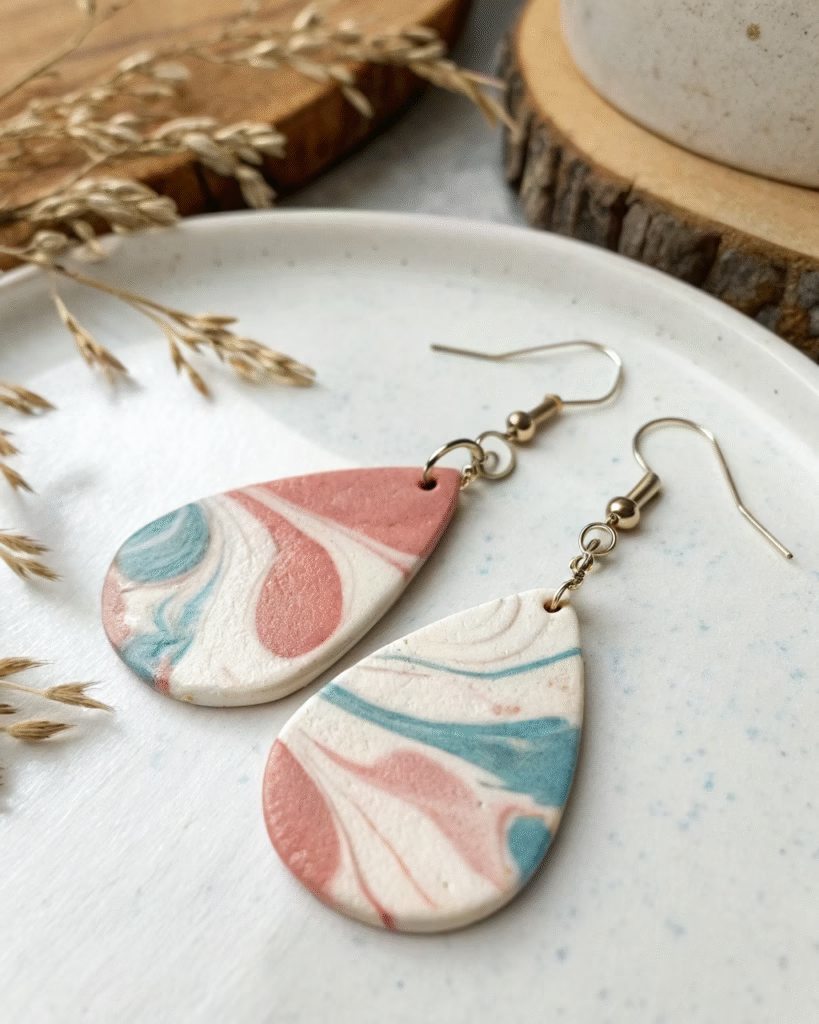
Blend two or more clay colors slightly to create a marbled effect. Cut into teardrops or ovals for a stylish look.
3. Geometric Shapes
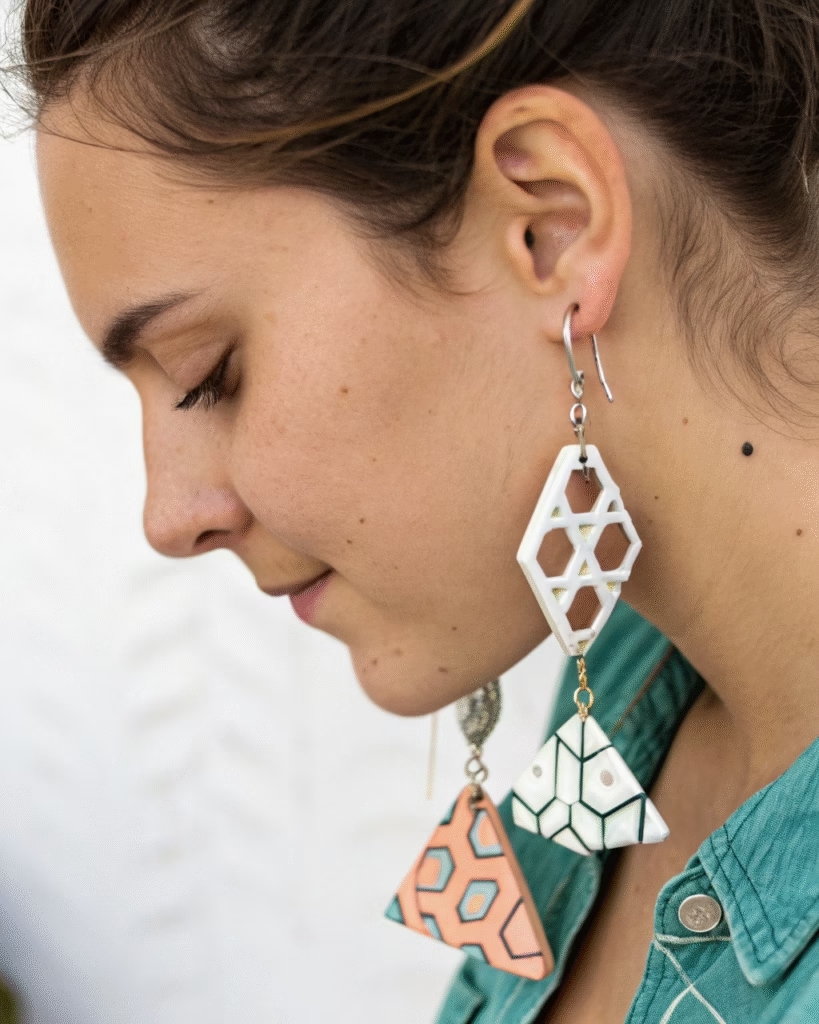
Cut clay into triangles, squares, or hexagons. Perfect for creating modern and trendy earrings.
4. Floral Clay Earrings
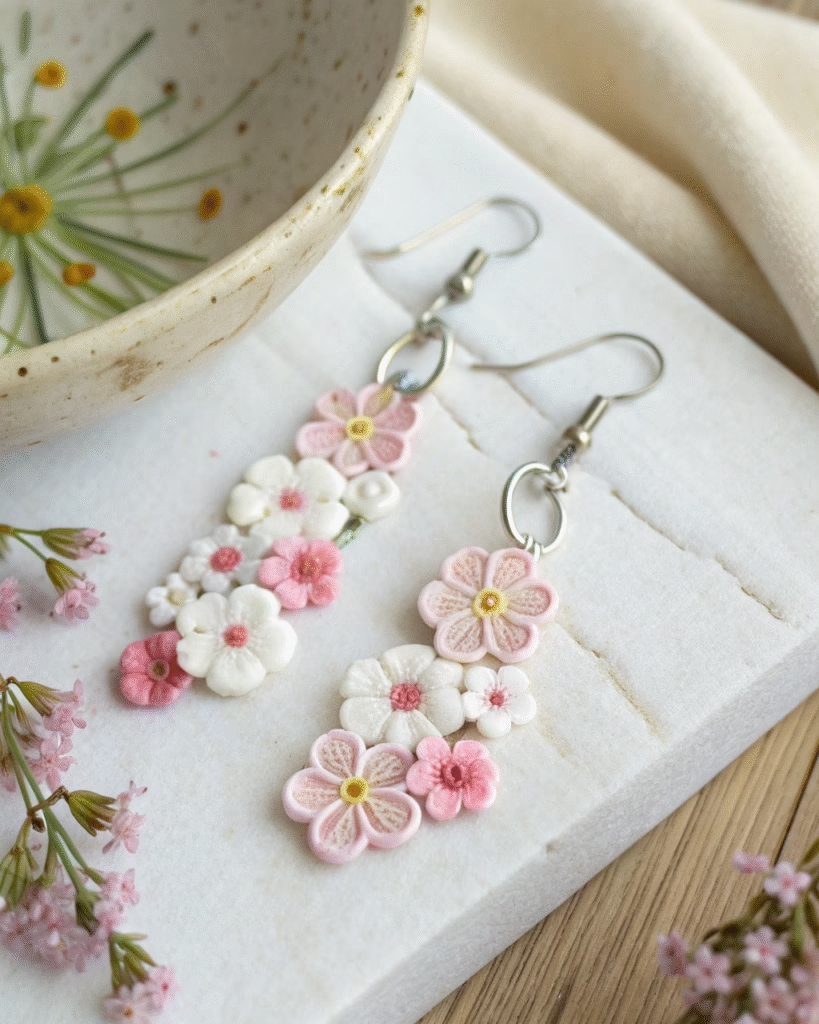
Form tiny petals and arrange them into flowers. A sweet, feminine style ideal for spring or summer.
5. Layered Arch Earrings
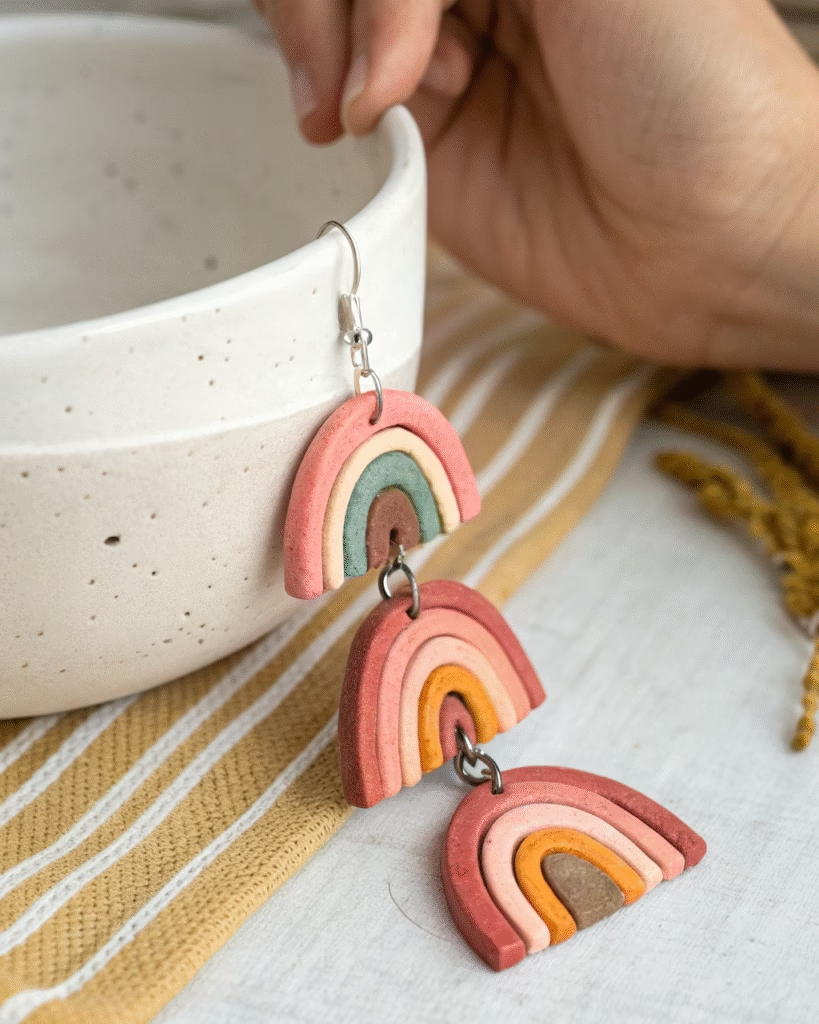
Stack clay arches in different sizes for a fun layered effect. Add contrasting colors to make them pop.
6. Textured Clay Earrings
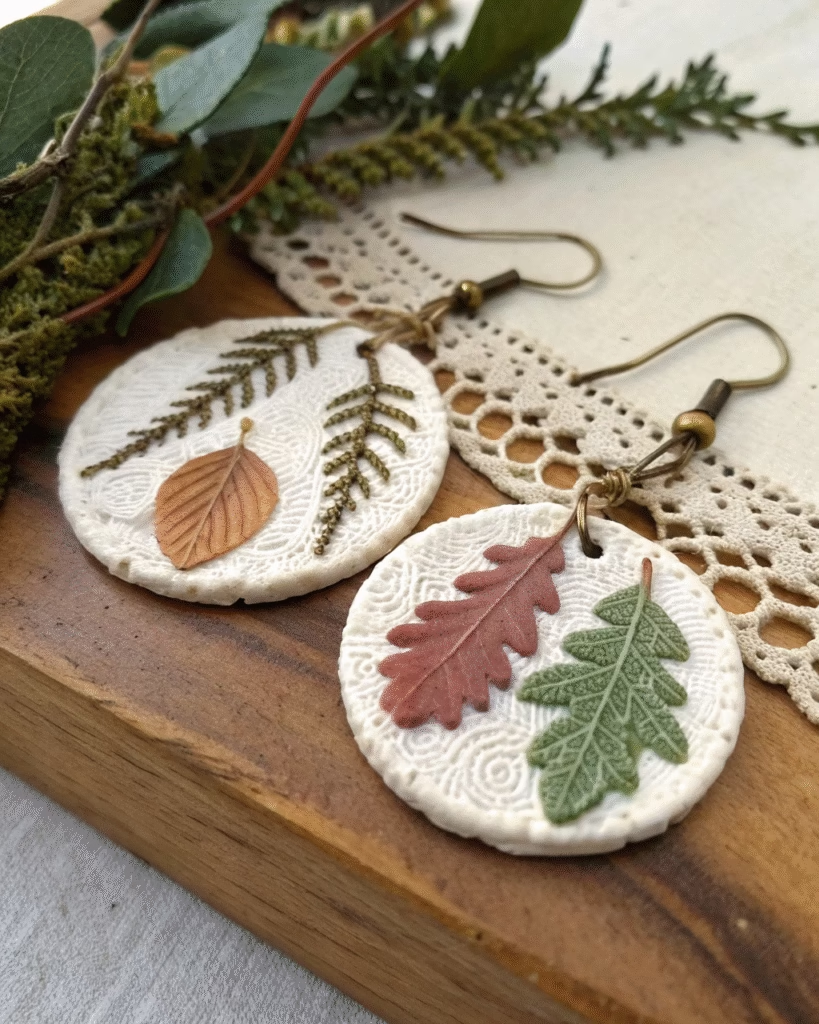
Press lace, fabric, or leaves onto the clay before drying. The natural textures add depth and uniqueness.
7. Clay Hoop Charms
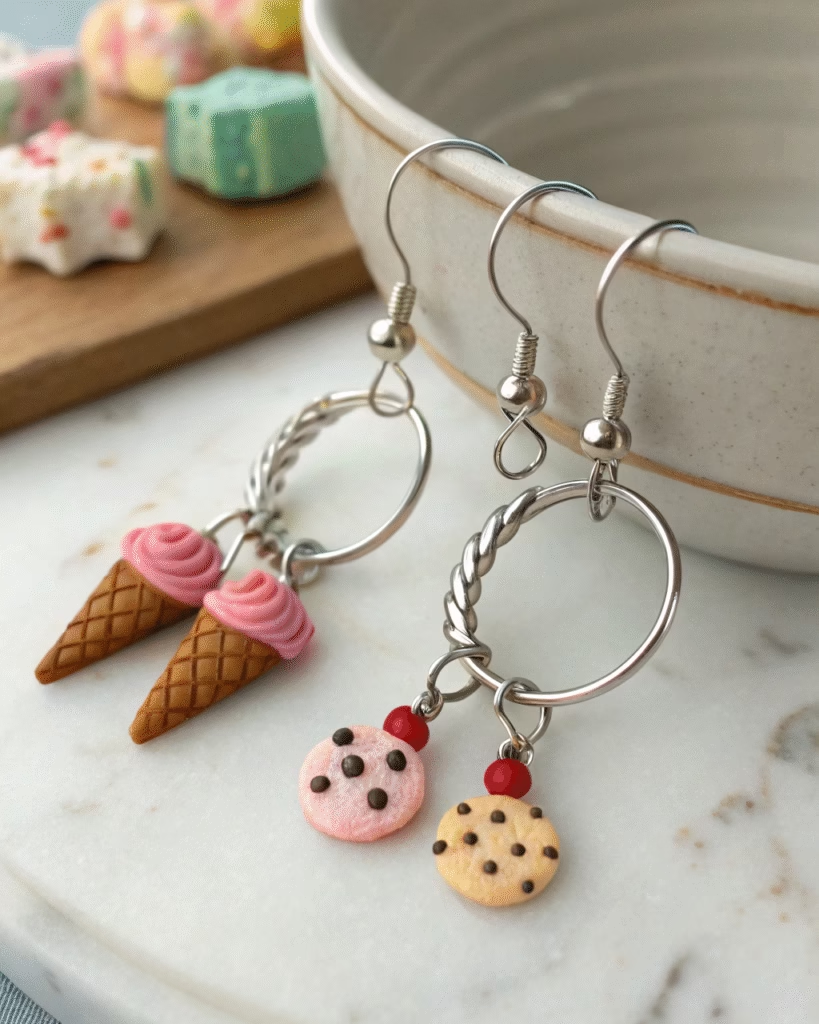
Shape tiny clay charms and hang them from metal hoops. A creative twist on classic hoop earrings.
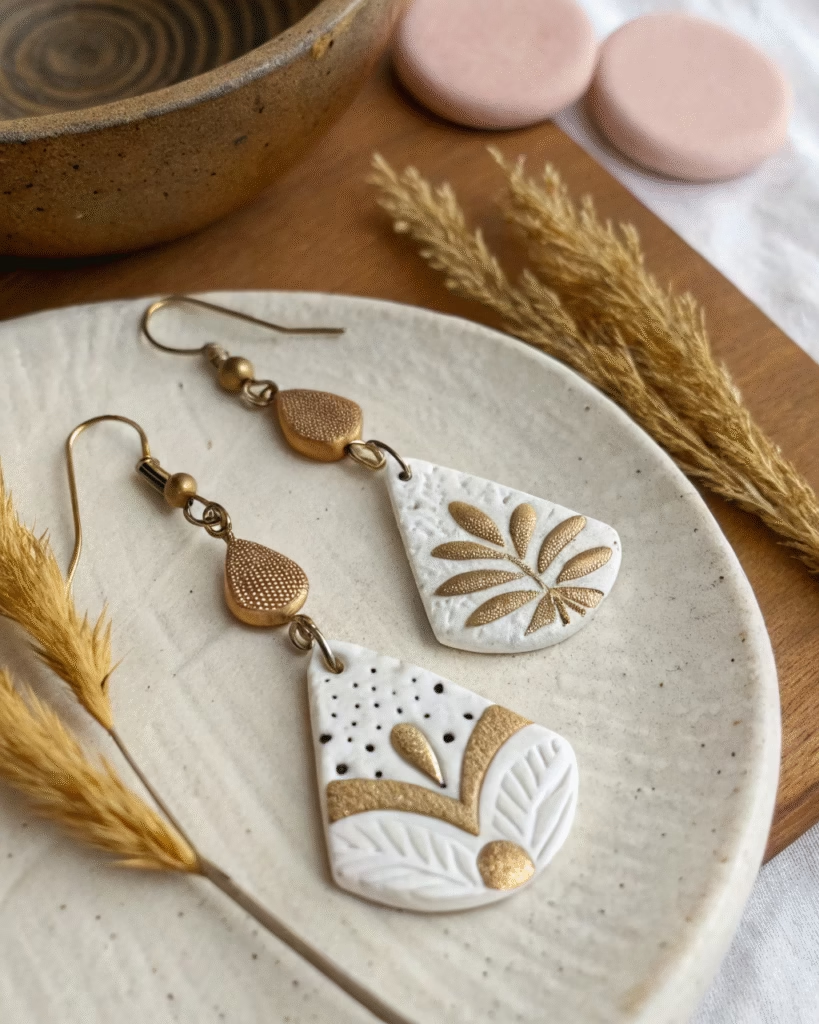
8. Painted Statement Earrings

Make larger clay shapes and hand-paint designs on them. Great for bold, artsy statement pieces.
9. Speckled Clay Studs
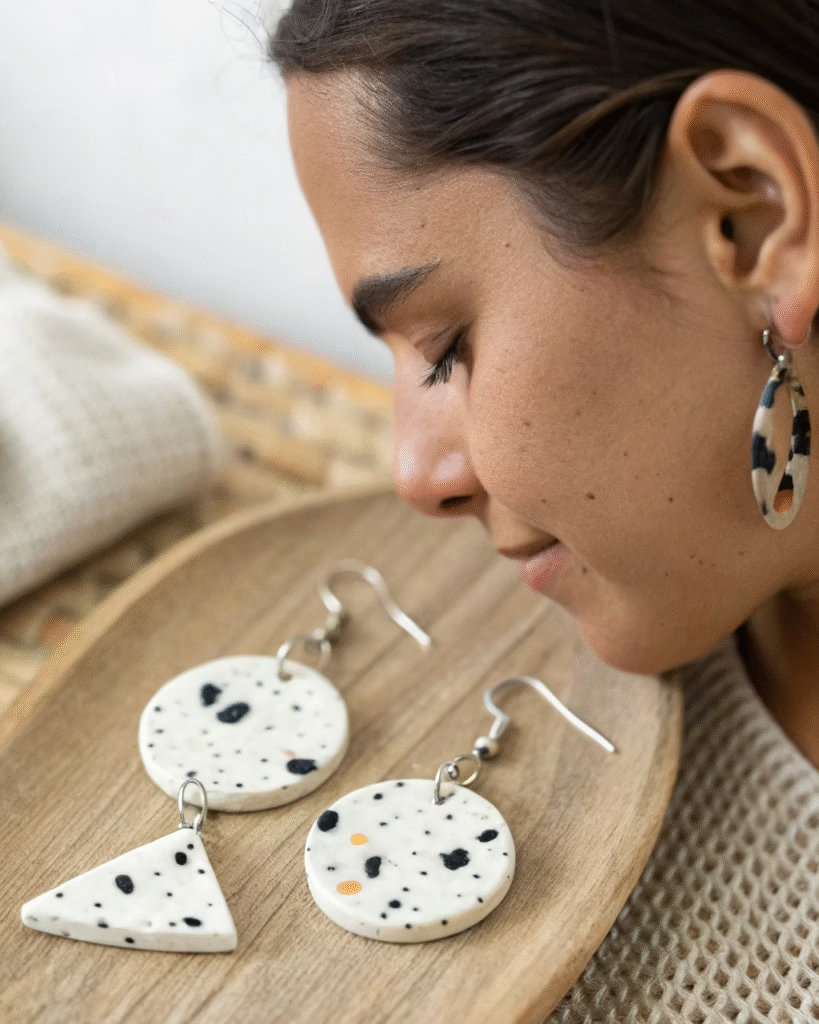
Mix a little black paint into white clay for a speckled terrazzo look. Simple, modern, and eye-catching.
10. Clay Leaf Earrings
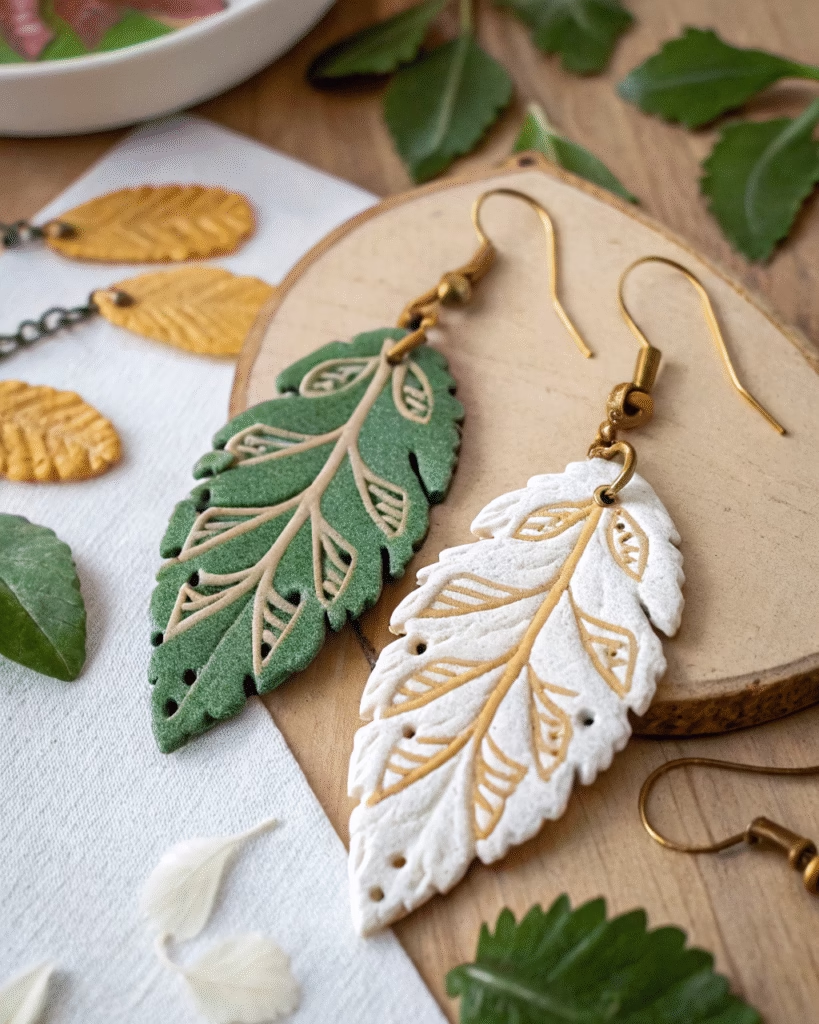
Shape clay into delicate leaves with carved details. Paint in green, gold, or white for a nature-inspired vibe.
11. Abstract Shapes
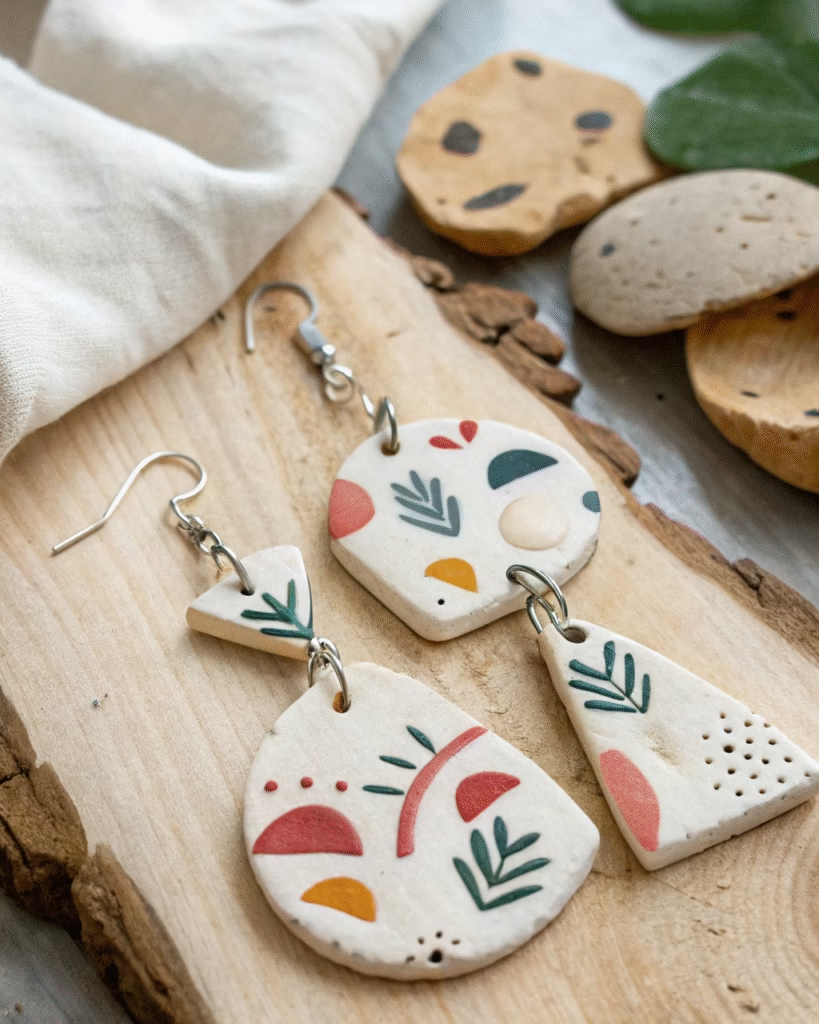
Cut freeform shapes and pair them together for abstract designs. A playful idea for casual wear.
12. Clay Dangles
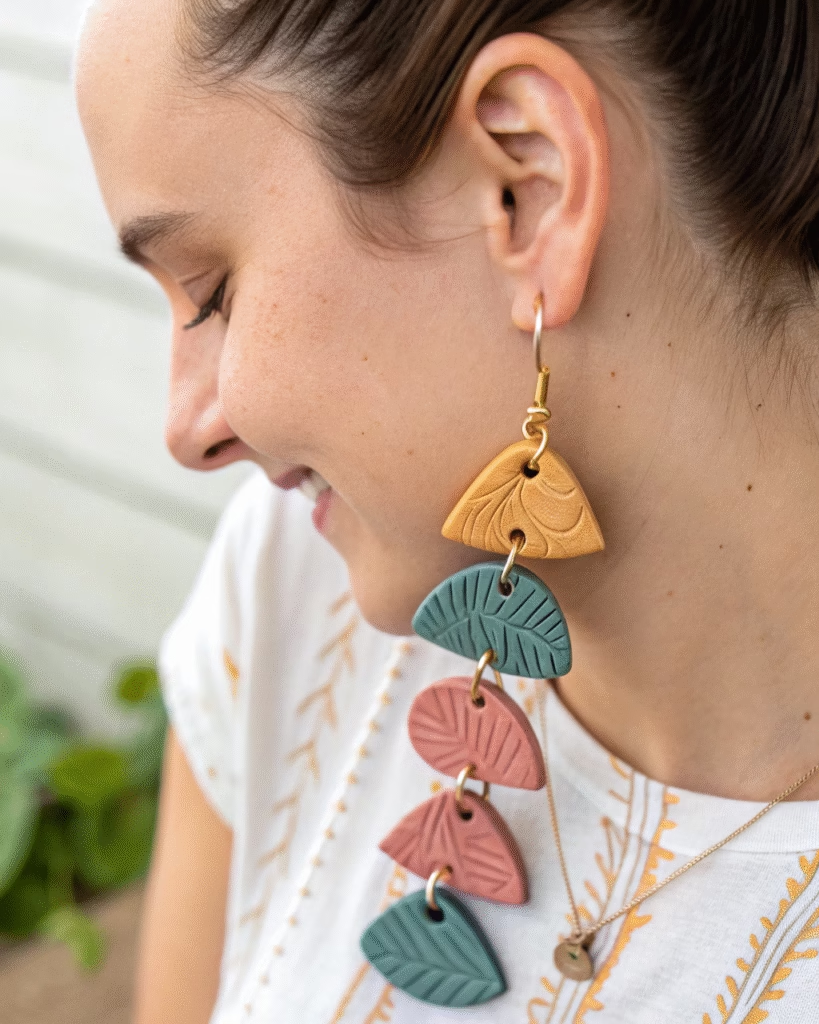
Stack multiple shapes with jump rings for dangling earrings. They move beautifully and add flair to any outfit.
13. Metallic-Tipped Earrings
Dip part of your clay earrings in metallic paint. This adds a touch of elegance without being over the top.
14. Boho-Inspired Clay Earrings
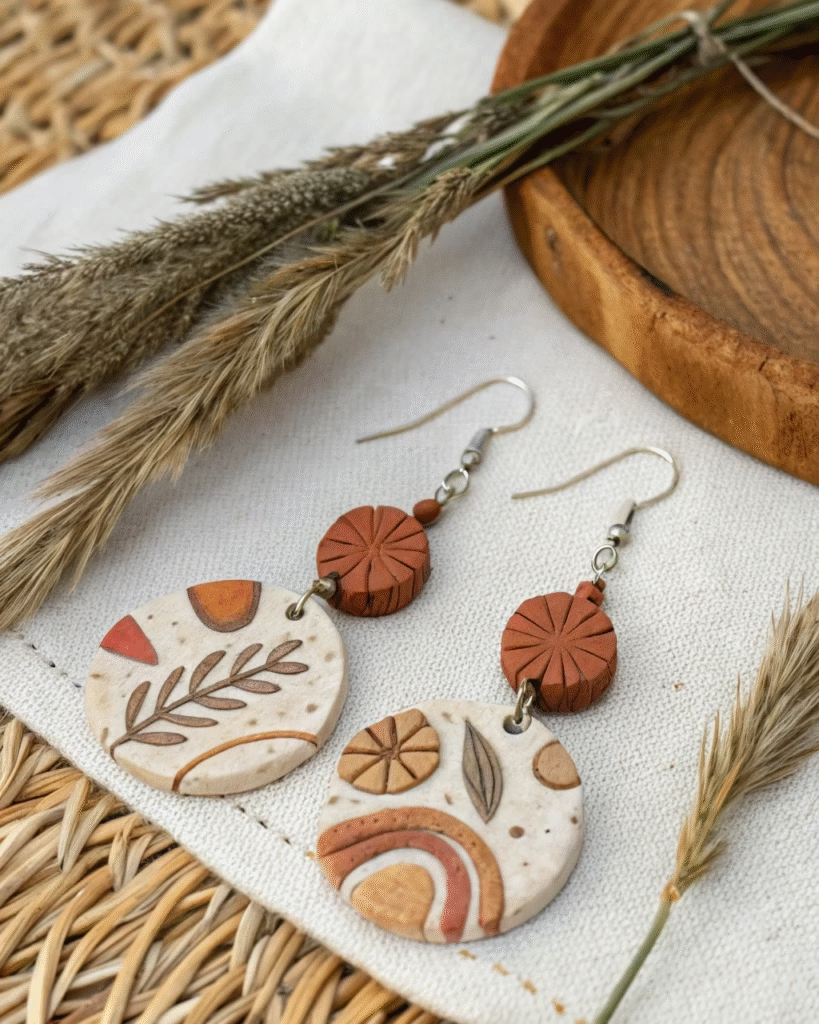
Combine earthy tones and organic shapes for a relaxed boho vibe. Perfect for casual everyday wear.
15. Custom Color Mixes
Experiment by mixing pigments into clay before shaping. You can create one-of-a-kind earrings in your favorite shades.
Final Thoughts
Air dry clay earrings are an easy way to make jewelry that feels personal and creative. With a little time and imagination, you can design earrings that match your style and stand out as handmade treasures.