13+ Patio Kitchen DIY Ideas for Outdoor Cooking
An outdoor kitchen does not have to cost a fortune or require a professional contractor.
With the right ideas and a willingness to build some or all of it yourself, you can create a patio kitchen that makes outdoor cooking genuinely enjoyable, keeps the host connected to the gathering, and becomes one of the most-used features of your entire outdoor space.
Why a DIY Patio Kitchen Is Worth the Effort
Building an outdoor kitchen yourself rather than buying a prefabricated system or hiring a contractor to design and build one from scratch takes more time and planning upfront. What it gives you in return is a kitchen that is precisely sized for your space, built to your specific requirements, significantly more affordable than a professionally installed equivalent, and something you will feel a genuine sense of ownership and pride in every time you use it.
The Cost Difference Is Significant
A professionally designed and installed outdoor kitchen with built-in grill, countertop, sink, and storage can cost anywhere from fifteen thousand to fifty thousand dollars or more depending on size, materials, and features. A well-planned DIY version of a similar kitchen using a combination of concrete block construction, a freestanding grill, concrete or tile countertops, and weather-resistant cabinetry can be built for a fraction of that cost. The skill and labor you bring yourself is the single biggest cost saving in any DIY outdoor kitchen project.
DIY Allows for Incremental Building
One of the greatest advantages of building your outdoor kitchen yourself is that you can start small and add to it over time as budget and confidence grow. Begin with a simple built-in grill station and a concrete countertop. Add a sink the following season. Build a pizza oven the season after that. A DIY approach lets the kitchen evolve with your cooking ambitions rather than requiring you to commit to a full specification before you have even used the space.
The Result Fits Your Space Exactly
Prefabricated outdoor kitchen modules are designed to fit standard configurations and standard spaces. Your patio almost certainly is not standard. Building yourself means every counter height, every cabinet depth, every surface dimension, and every layout decision is made for your specific space, your specific cooking habits, and your specific aesthetic. The result is a kitchen that fits your outdoor space the way a bespoke piece of furniture fits a room.
Planning Your DIY Patio Kitchen
Good planning is what separates a DIY outdoor kitchen that works brilliantly from one that creates frustration and expensive problems. Here is what to think through before you start building anything.
Decide on Your Layout First
The layout of your outdoor kitchen determines everything else. The most common and practical outdoor kitchen layout is an L-shape or straight run against a wall or boundary, with the cooking zone on one side and preparation and serving zones extending from it. Think carefully about the flow between cooking and serving, where guests will gather in relation to the cooking area, and how the kitchen connects to the main patio seating and dining zones.
The cook should face the guests rather than a wall wherever possible. This keeps the host engaged in the social dynamic of the gathering rather than cut off from it, which is the whole social point of an outdoor kitchen over cooking inside.
Identify Your Utilities Early
Water, gas, and electricity are the three utilities that may be needed for your outdoor kitchen depending on the features you plan to include. A sink needs a water supply and a drain. A built-in gas grill or pizza oven needs a gas supply. Lighting, a refrigerator, and any electrical appliances need power. All of these utilities need to be planned and installed before the kitchen structure is built around them. Retrofitting utilities through finished concrete block or masonry is expensive, disruptive, and often results in a less clean finished appearance than planning them in from the start.
Always use a licensed plumber for water supply and drainage connections and a licensed electrician for any outdoor power installation. Gas line work must be done by a qualified gas fitter. These are not areas to cut corners on regardless of your DIY skill level.
Choose Materials That Handle Outdoor Conditions
Every material in your outdoor kitchen will be exposed to sun, rain, temperature fluctuations, cooking heat, food spills, and general outdoor use. Not all materials handle these conditions equally. Concrete block and masonry are the most durable structural choices for an outdoor kitchen frame and virtually indestructible once properly built. Stainless steel is the most appropriate surface material for areas around cooking appliances. Porcelain tiles and sealed concrete are both excellent countertop options. Powder-coated aluminium or marine-grade stainless steel are the right choices for any metal hardware, handles, and fixtures.
Avoid untreated timber for structural elements in contact with the ground, standard kitchen cabinetry not rated for outdoor use, and indoor-grade tile adhesive and grout for countertop applications.
Consider the Prevailing Wind
Cooking smoke needs to go somewhere, and where it goes is determined by the prevailing wind direction relative to your kitchen position. Position the cooking zone so that smoke blows away from the main seating and dining area rather than across it. If your site gives you no choice about the cooking position, a chimney or exhaust hood above the grill can redirect smoke upward and away from the patio.
Think About Shade and Shelter
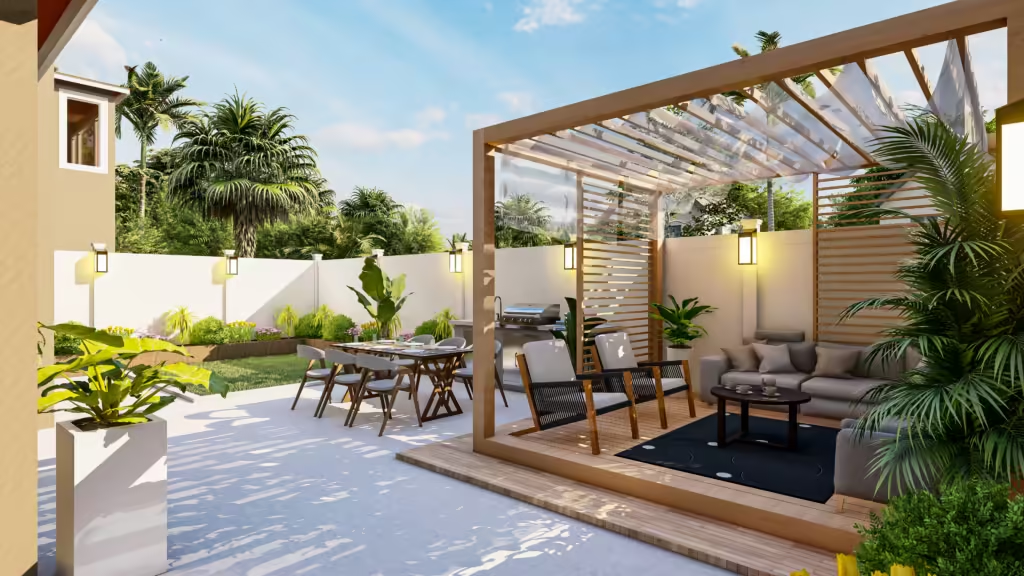
Outdoor cooking in full summer sun is uncomfortable for the cook and potentially damaging to some appliances over time. A pergola, shade sail, or roof structure over the cooking zone makes the kitchen genuinely pleasant to use during the hottest part of the day and keeps any appliances not in use protected from direct rainfall. Plan the shade structure as part of the kitchen design rather than adding it as an afterthought.
DIY Outdoor Kitchen Materials Guide
Choosing the right materials for each element of your outdoor kitchen is one of the most important decisions in the whole project. Here is a thorough breakdown of the best options for every part of the build.
For the Frame and Structure
Concrete block, also called cinder block or CMU, is the most widely used material for DIY outdoor kitchen frames. It is affordable, extremely durable, fireproof, and does not require specialist skills to lay. A concrete block frame can be built to any shape and size, finished with render or tile on the exterior, and supports heavy countertops and appliances without any structural concerns. It is the material that most DIY outdoor kitchen guides recommend as the starting point for any built-in installation.
Timber framing with cement board cladding is an alternative that is faster to construct and more forgiving for less experienced builders. The timber frame provides the structure and the cement board cladding provides the weather-resistant surface that can then be tiled or rendered. This approach is lighter than concrete block and can be demounted and modified more easily if your needs change.
Steel stud framing with cement board is the third common approach, used by builders who want the speed of metal framing with the weather resistance of cement board cladding. It is faster than both concrete block and timber framing and produces a very clean result.
For Countertops
Poured concrete countertops are the most popular DIY outdoor kitchen countertop choice because they can be formed to any shape, finished in a range of textures and colors, and cast in place over the kitchen frame with no specialist equipment beyond basic concrete mixing and forming skills. A concrete countertop needs to be properly sealed with an outdoor-rated concrete sealer to prevent staining and water damage.
Porcelain tile over a cement board substrate is the most affordable and accessible countertop option. Large format porcelain in a stone or concrete look finish is the most popular choice for outdoor kitchens. Tile is stain-resistant, heat-resistant, easy to clean, and requires no sealing. The main limitation is that tiled countertops are not as smooth and seamless as poured concrete or stone surfaces.
Natural stone slabs in granite or soapstone are the most premium countertop option and the most heat-resistant. Both are appropriate for outdoor use and handle outdoor temperature fluctuations well. Natural stone countertops are typically more expensive than concrete or tile and may require professional cutting and installation for a perfect fit.
For Exterior Cladding
Porcelain tile is the most popular exterior cladding for outdoor kitchen frames. It is durable, waterproof, available in a wide range of styles including very convincing stone and brick looks, and straightforward to apply over a cement board or rendered block substrate. Natural stone veneer cladding creates a beautiful, premium appearance that suits rustic and traditional garden styles particularly well. Rendered and painted block or cement board is the most affordable cladding option and suits contemporary and minimalist outdoor kitchen designs.
Safety Rules for DIY Outdoor Kitchens
Safety is the area where DIY outdoor kitchen projects most commonly fall short. These rules are non-negotiable regardless of your skill level or the complexity of your build.
Gas Safety Is Not DIY Territory
If your outdoor kitchen includes a gas grill, a gas pizza oven, a gas side burner, or any other gas appliance, the gas supply line connection must be installed by a licensed gas fitter. This is a legal requirement in most US jurisdictions and a critical safety requirement everywhere. A gas leak in an outdoor kitchen can cause a fire or explosion. Do not attempt to connect, extend, or modify gas lines yourself regardless of how straightforward it appears.
Electrical Work Requires a Licensed Electrician
Any new outdoor power circuit, whether for a refrigerator, under-counter lighting, a blender outlet, or any other electrical application, must be installed by a licensed electrician. Outdoor electrical work requires specific weatherproof fittings, GFCI protection, and appropriate conduit or cable protection that a general DIYer is not qualified to determine and install safely.
Maintain Safe Clearances Around the Grill
Built-in grills require minimum clearances from combustible surfaces on all sides and above. These clearances vary by grill model and are specified in the manufacturer’s installation instructions. Always follow the manufacturer’s clearance requirements exactly and use only non-combustible materials within those clearance zones. Combustible materials within the specified clearance zone of a grill are a serious fire risk.
Ensure Adequate Ventilation
Any enclosed or partially enclosed cooking area needs adequate ventilation for both smoke extraction and the safe operation of gas appliances. A gas grill operating in an insufficiently ventilated space can produce dangerous levels of carbon monoxide. Never install a gas cooking appliance in a fully enclosed structure and always ensure there is adequate natural ventilation around any outdoor cooking appliance.
These DIY ideas cover every budget, every skill level, and every patio size. With a few creative DIY projects, you can design a stylish and functional patio kitchen that fits your space, budget, and cooking style.
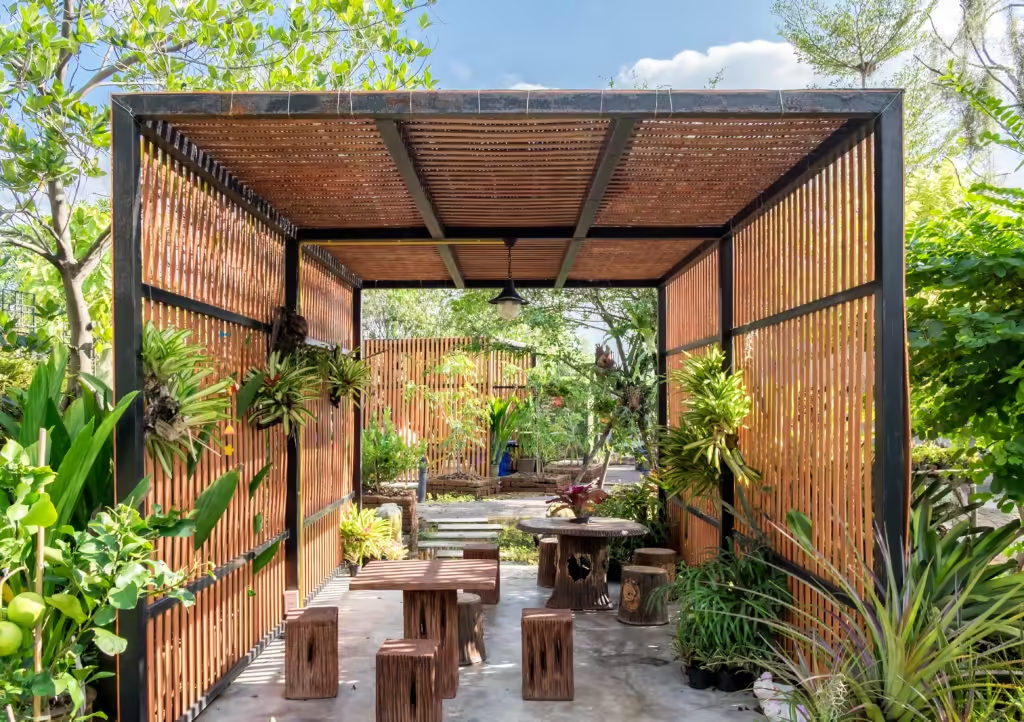
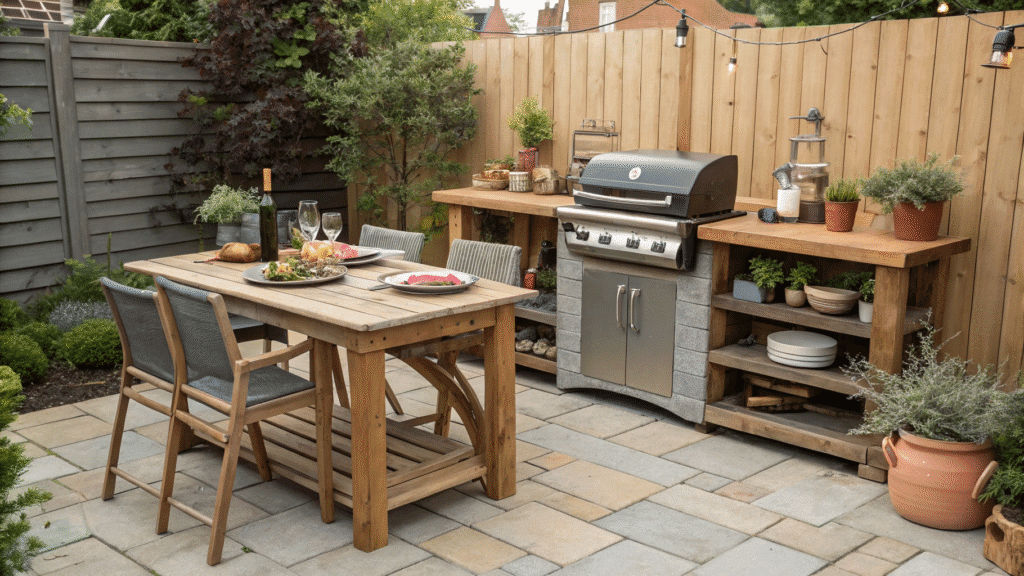
1. Built-In Grill Station
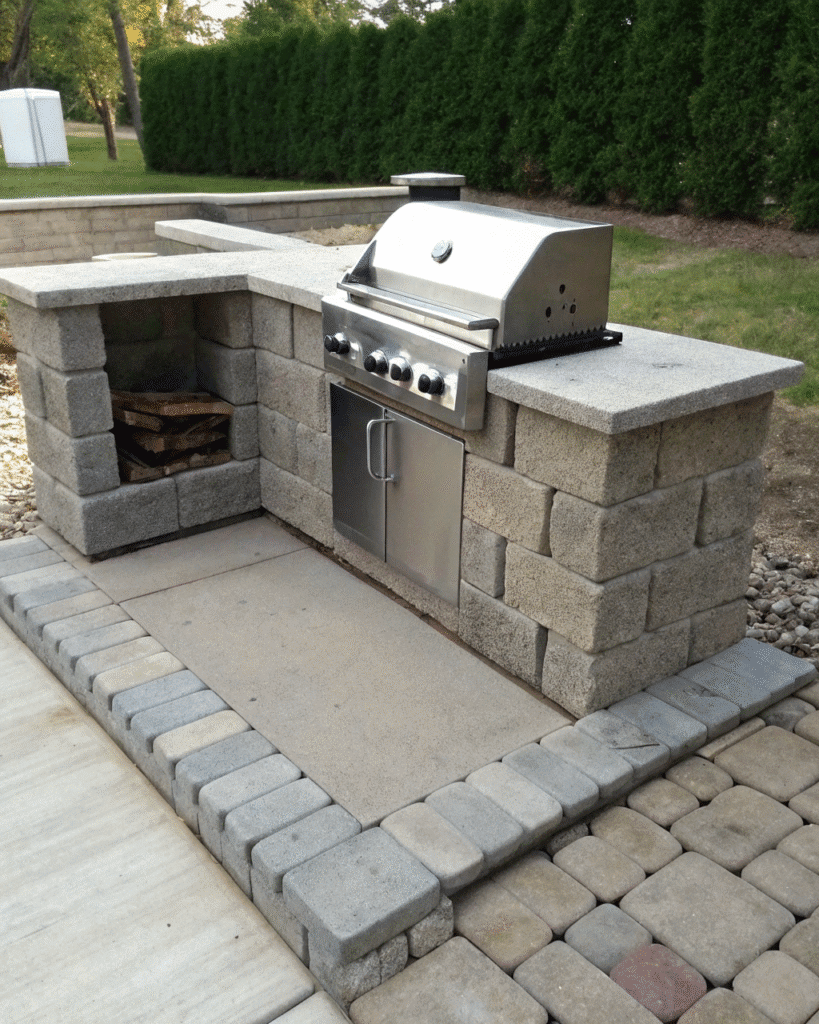
Create a simple built-in grill setup using concrete blocks or stone.
Pro Tip: Add a small countertop area next to it for easy prep and serving.
2. Wooden Counter Space
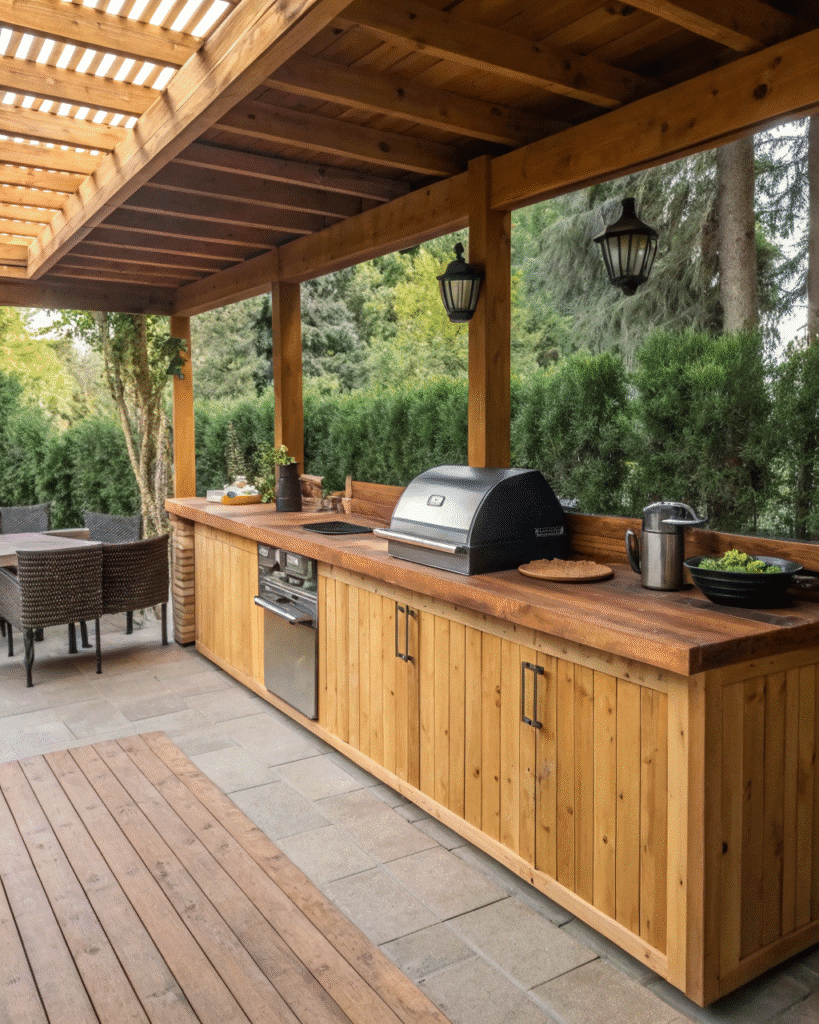
Install a wooden countertop for a warm, rustic feel.
Pro Tip: Use weatherproof sealant to protect the surface from outdoor elements.
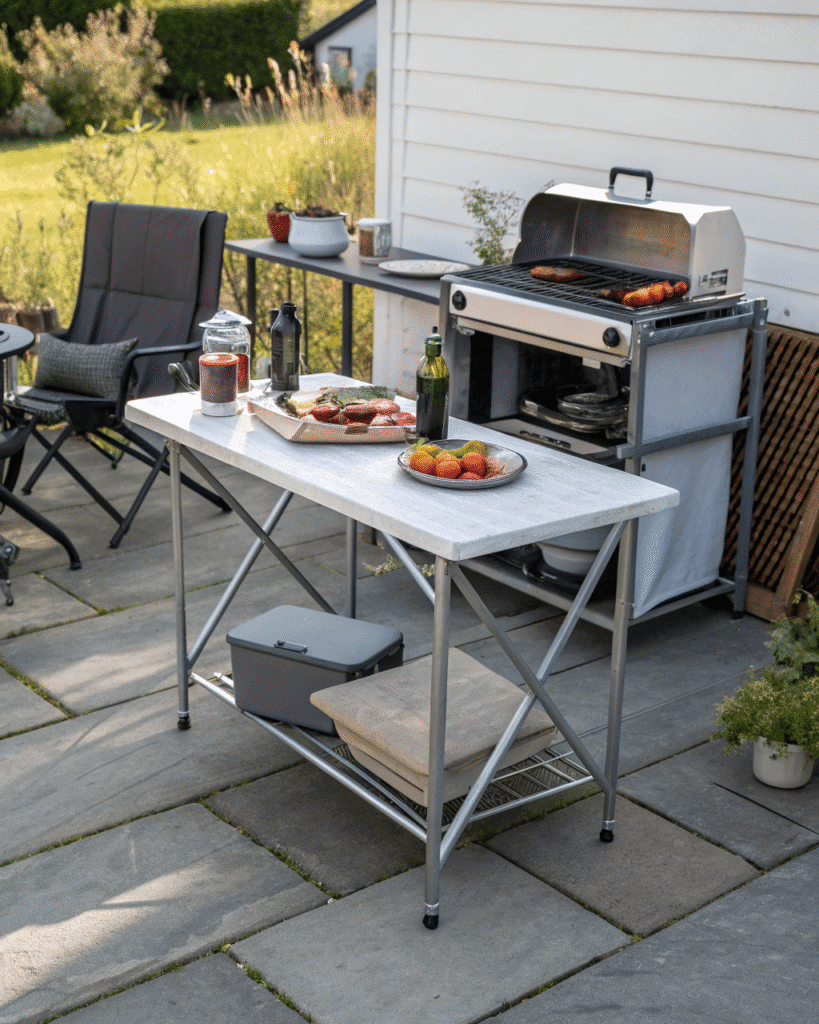
3. Compact Bar Cart Kitchen
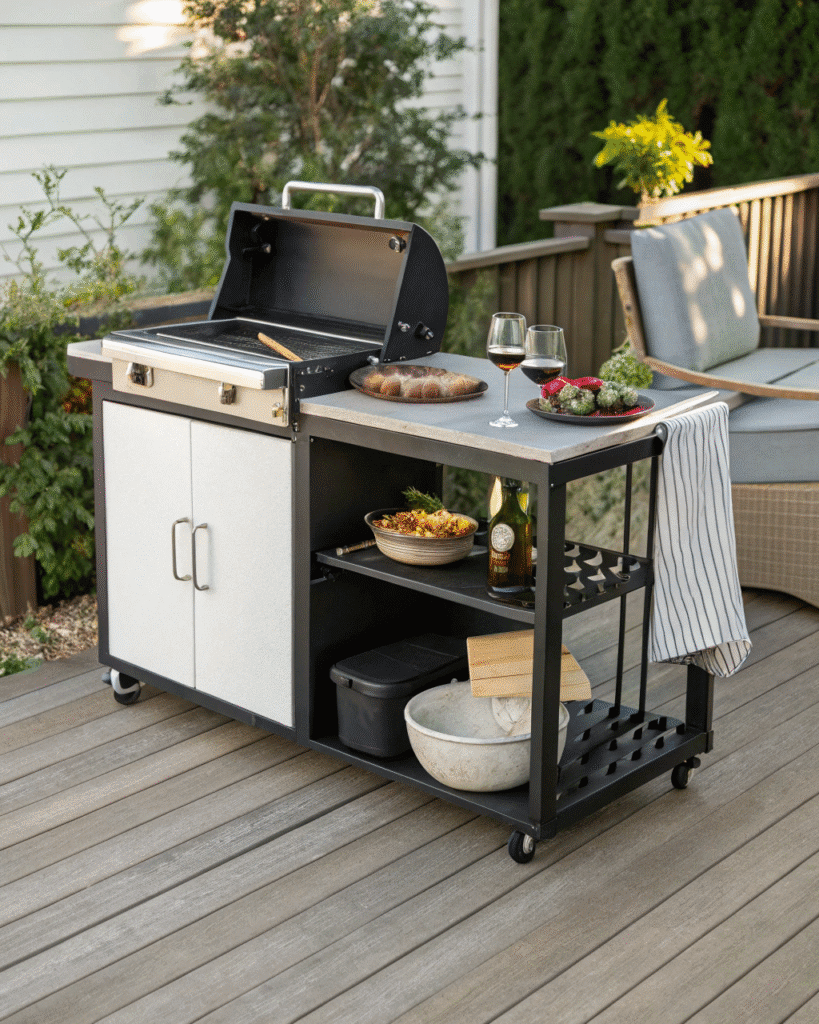
A portable bar cart can double as a mini outdoor kitchen.
Pro Tip: Stock it with utensils, condiments, and a cutting board for quick access.
4. DIY Outdoor Sink
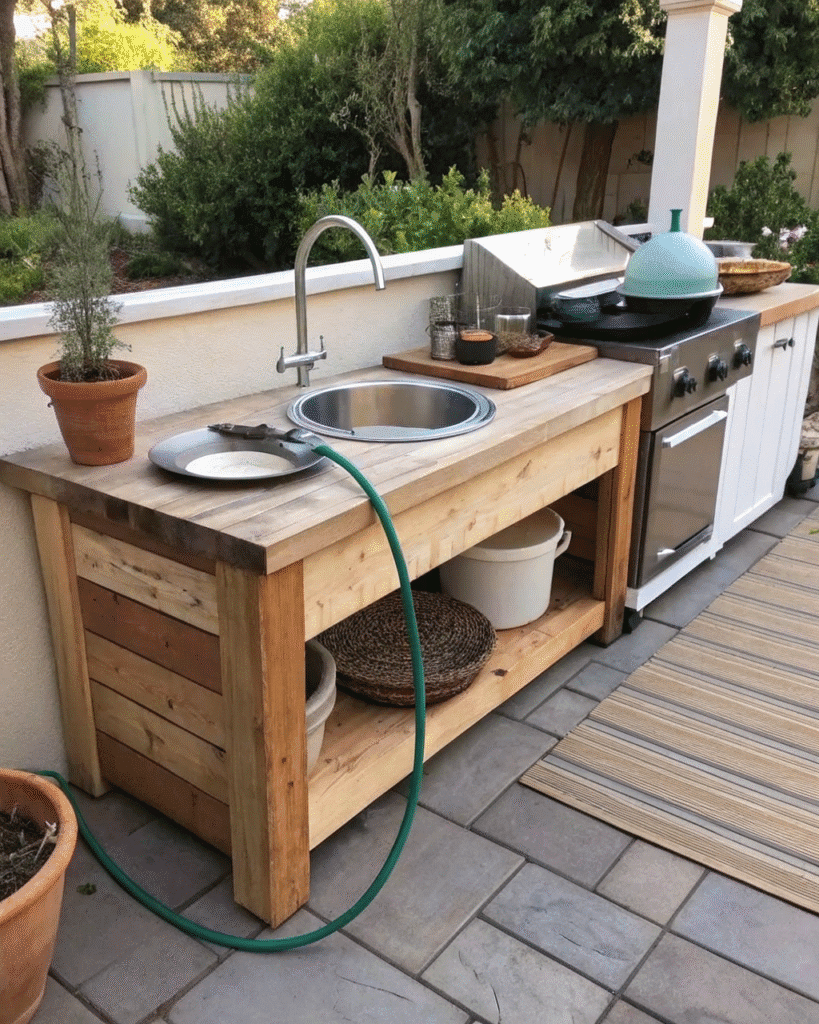
Add a small sink using a water hose attachment for easy cleanup.
Pro Tip: Use a galvanized bucket as a base for a charming farmhouse touch.
5. Brick Pizza Oven
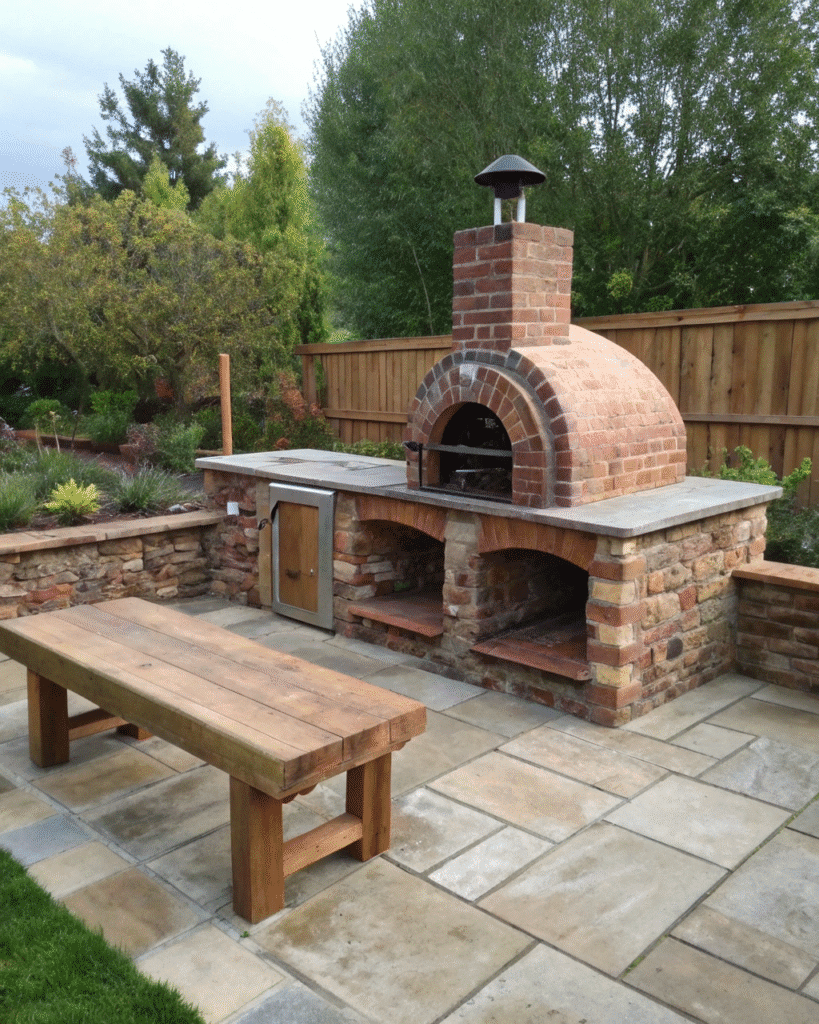
Build a DIY pizza oven for fun outdoor cooking with family and friends.
Pro Tip: Start with a small, dome-shaped design to save on space and materials.
6. Pallet Kitchen Setup

Reuse wooden pallets to create shelves and work surfaces for a rustic kitchen.
Pro Tip: Sand and treat the wood for durability and a smoother finish.
7. Outdoor Storage Cabinets
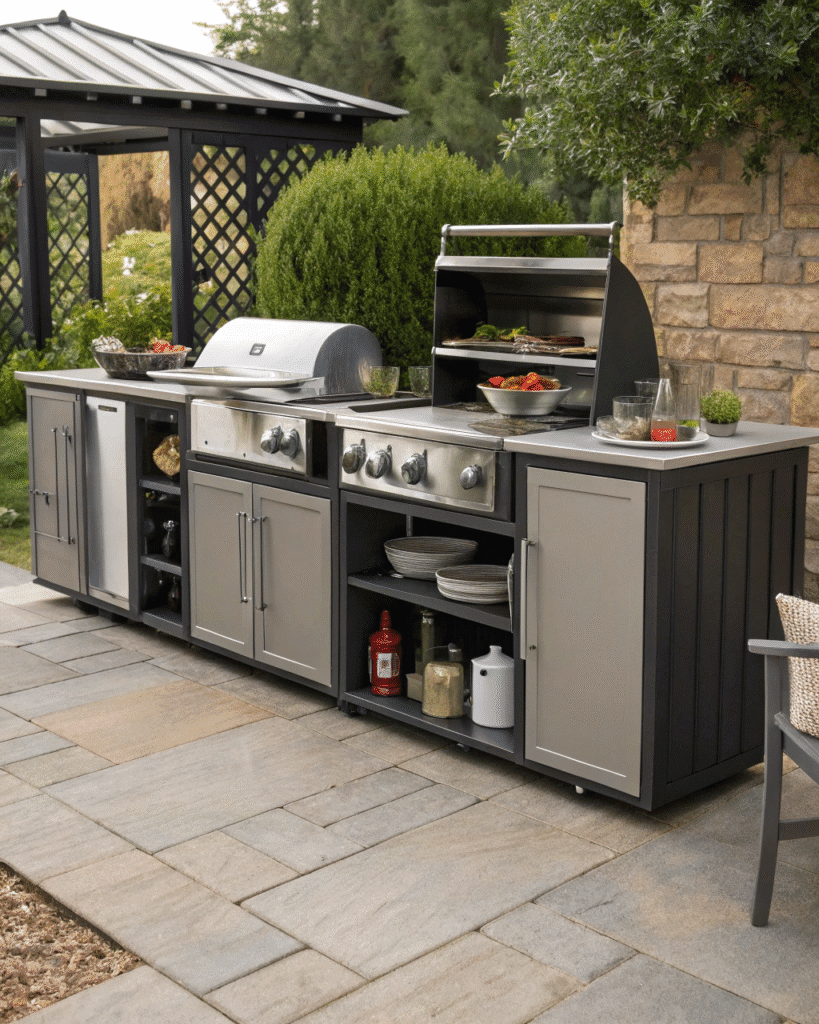
Add weatherproof cabinets to store cookware and grilling tools neatly.
Pro Tip: Choose stainless steel or painted wood to match your patio style.
8. Stone Counter with Built-In Grill
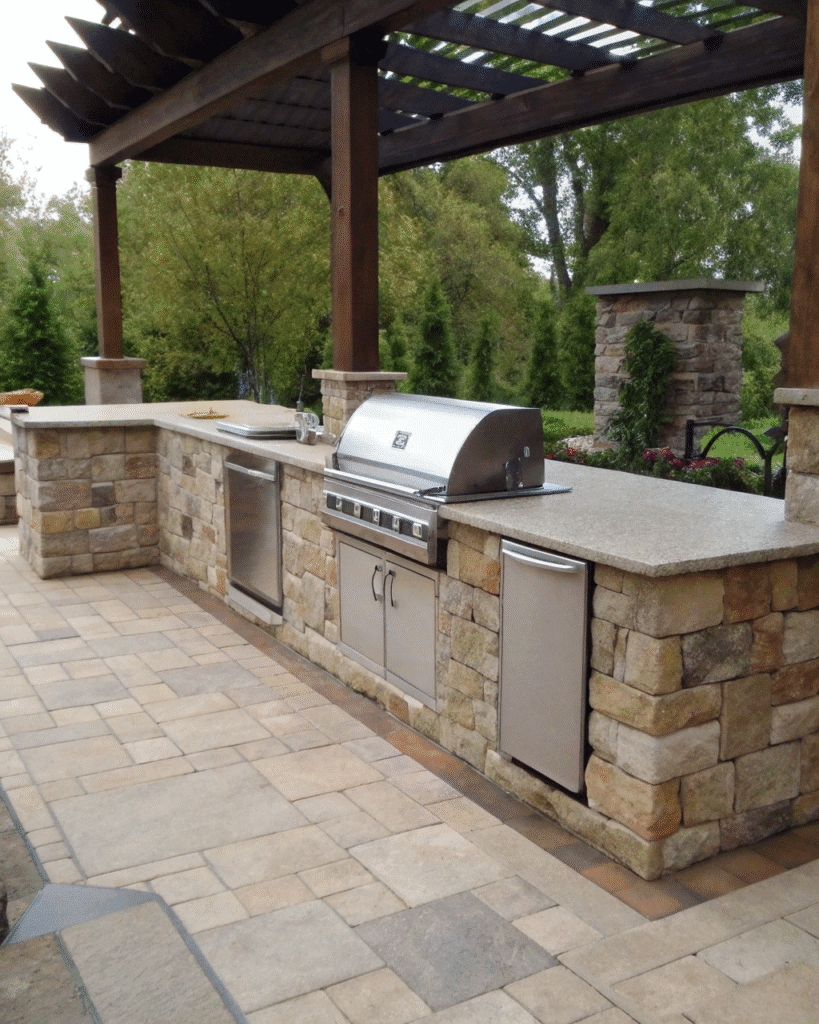
Combine a grill and countertop for a professional look that’s still DIY-friendly.
Pro Tip: Mix materials like stone and wood for texture and balance.
9. Small Bar Area
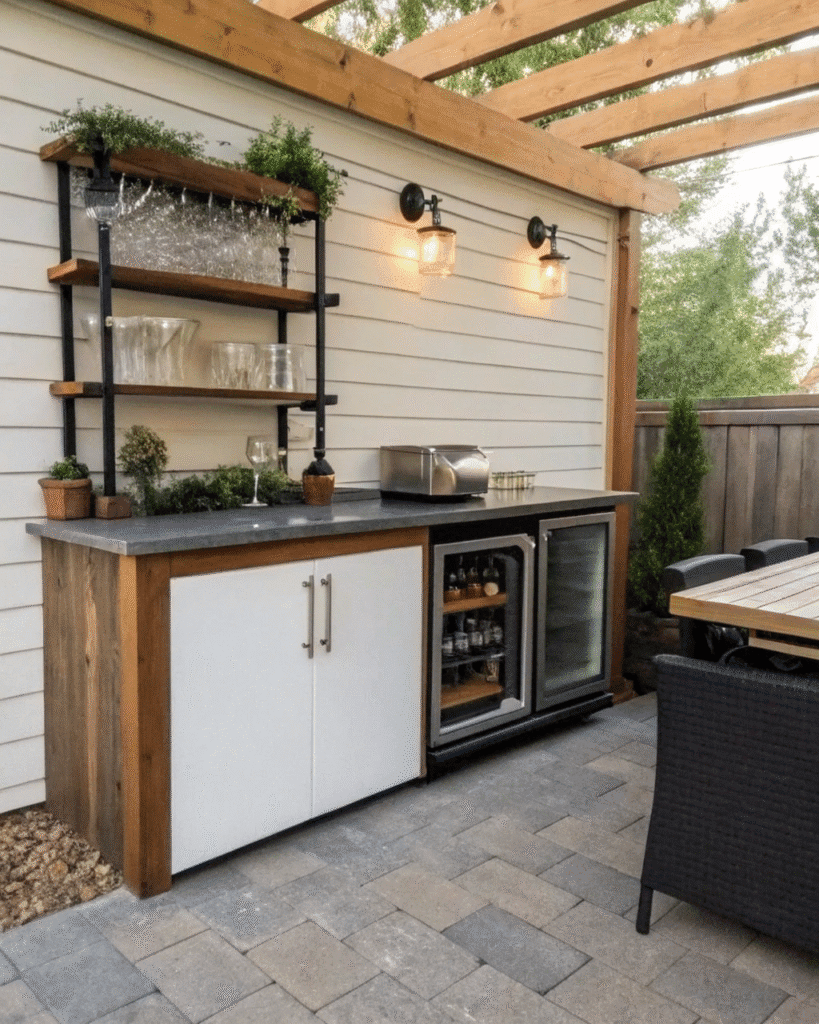
Create a drink station with a countertop, mini fridge, and shelves for glasses.
Pro Tip: Decorate with string lights for a festive evening vibe.
10. Tile Backsplash
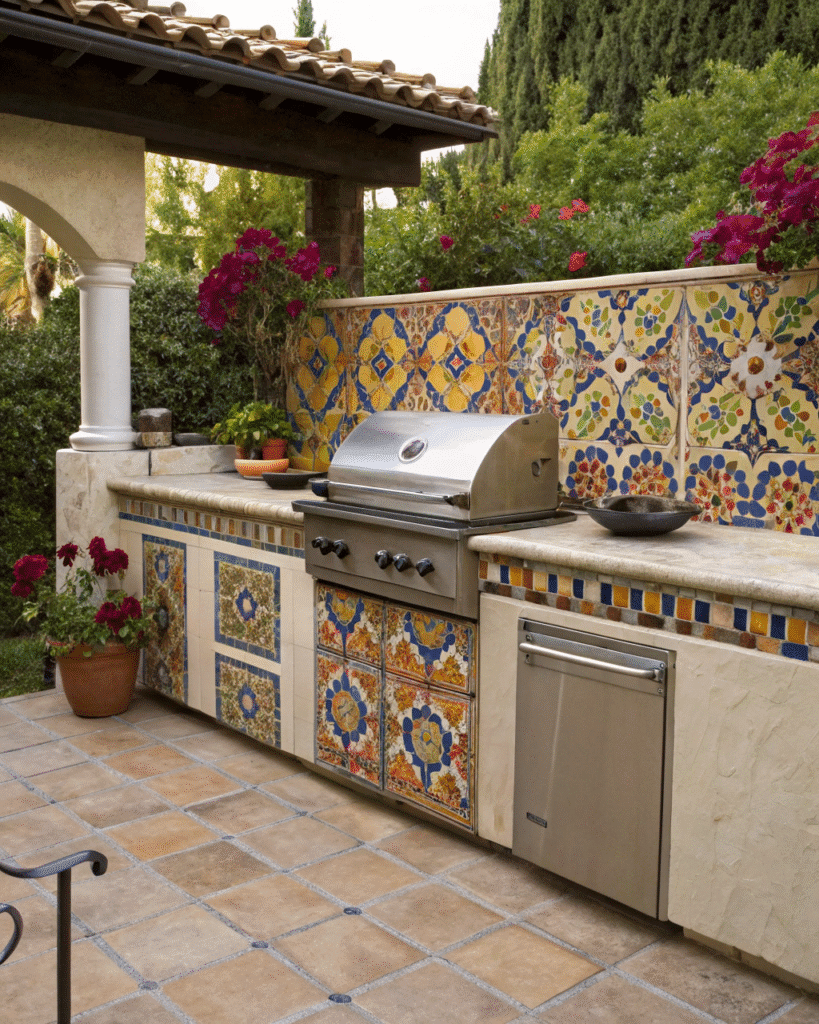
Add a colorful tile backsplash behind your cooking area for easy cleaning and style.
Pro Tip: Choose patterned outdoor tiles to bring character to the space.
11. Simple Concrete Countertop
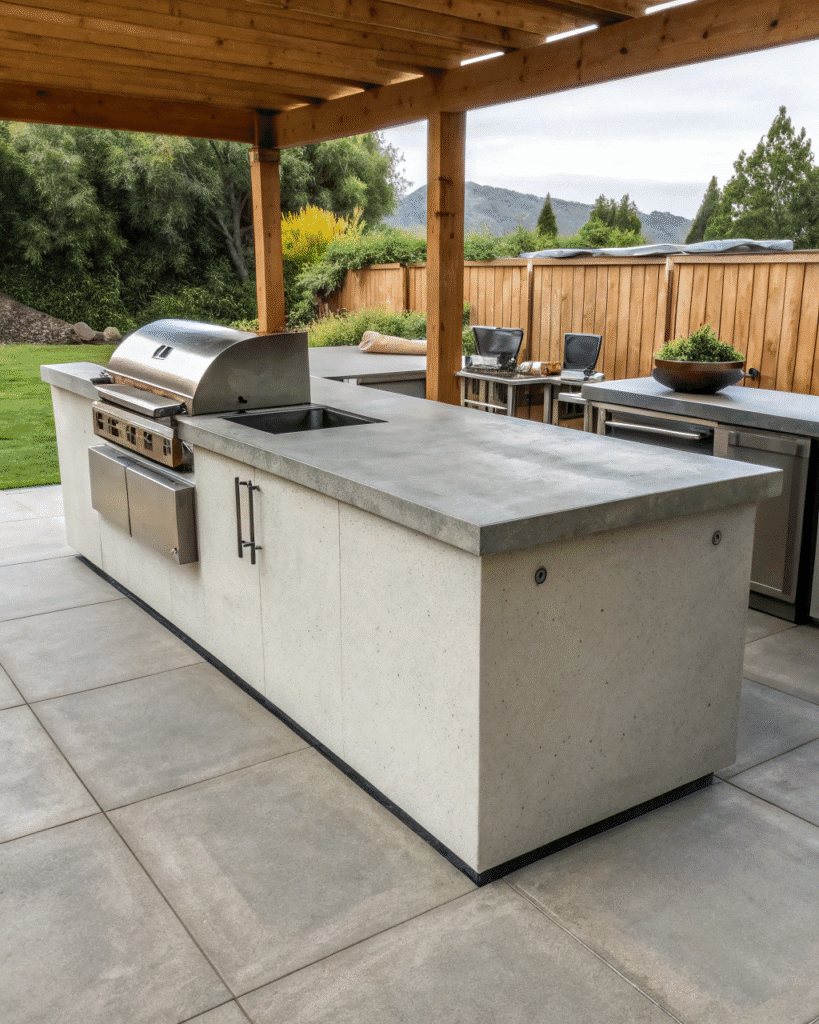
A DIY concrete counter is durable, modern, and perfect for outdoor use.
Pro Tip: Seal the surface to prevent staining from spills or grease.
12. Hanging Utensil Rack
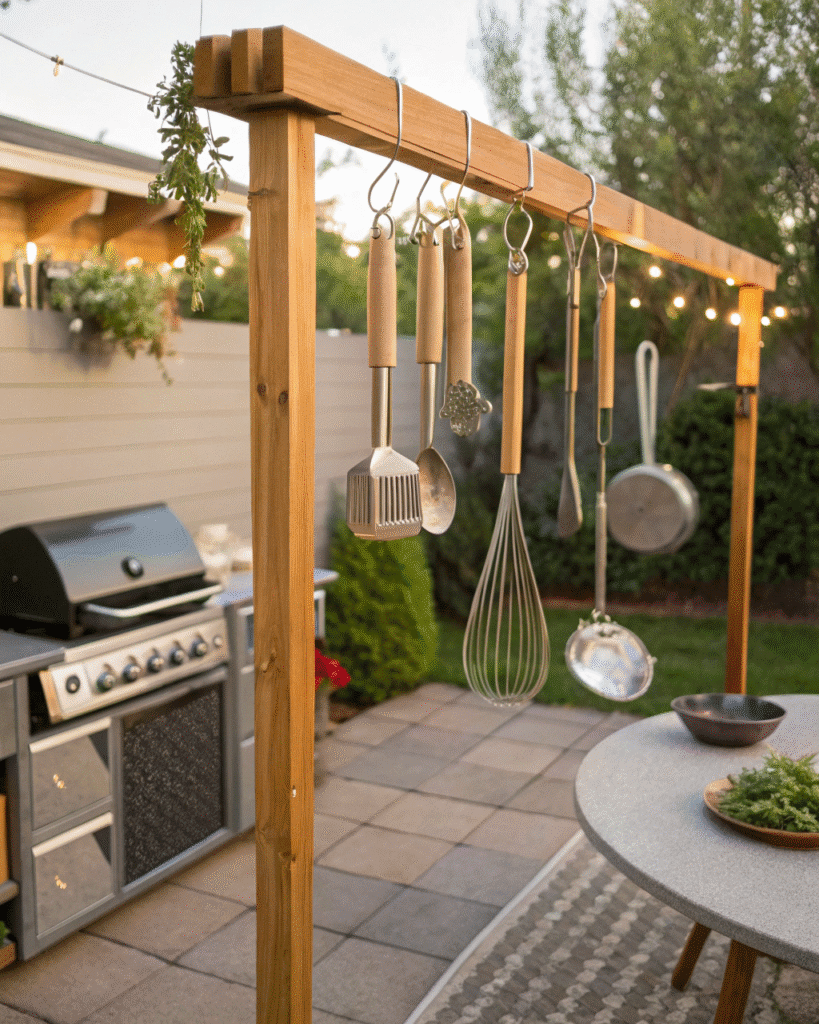
Keep tools handy by hanging them on a rack or mounted bar.
Pro Tip: Use S-hooks for flexibility and easy rearranging.
13. Foldable Prep Table
A fold-down table gives you workspace that tucks away when not in use.
Pro Tip: Mount it to a wall or fence for a space-saving solution in small patios.
Final Thoughts
A DIY patio kitchen is one of the most rewarding outdoor projects you can take on.
It takes more planning and effort than almost any other patio upgrade, but the result is a genuinely functional outdoor cooking space built exactly the way you want it, at a cost far below what professional installation would require.
Start with the idea that solves your most immediate cooking limitation, whether that is counter space, grill quality, storage, or prep area, and build from there. Your outdoor kitchen can grow with your ambitions one season at a time.
FAQs
Do I need a permit to build a DIY outdoor kitchen?
In most US municipalities, a built-in outdoor kitchen that includes gas, electrical, or plumbing connections requires a permit for those utility connections regardless of the structural element. Some jurisdictions also require a permit for the structural build itself, particularly if it is attached to the house or exceeds a certain size. Always check with your local building department before starting any utility connections and confirm whether a structural permit is required for the kitchen frame.
What is the best base material for a DIY outdoor kitchen frame?
Concrete block is the most recommended DIY outdoor kitchen frame material for its combination of strength, fire resistance, durability, affordability, and accessibility for builders without specialist skills. It handles outdoor conditions without deterioration, supports heavy countertops and appliances safely, and provides a solid substrate for tile, stone veneer, or render finishes.
How do I waterproof a DIY outdoor kitchen?
The exterior cladding, whether tile, stone veneer, or render, provides the primary weather protection for the kitchen structure. Countertops in concrete or natural stone should be sealed with an outdoor-rated penetrating sealer. Any timber elements should be treated with an exterior-grade timber preservative or oil. Joints between countertop and backsplash, between countertop and appliances, and at any wall or floor connections should be sealed with a food-safe, weatherproof silicone sealant.
Can I use a regular indoor grill in an outdoor kitchen?
No. Indoor kitchen appliances are not designed or rated for outdoor use and will corrode and fail rapidly when exposed to outdoor conditions regardless of how they are protected. Always use appliances specifically manufactured and rated for outdoor installation in any built-in outdoor kitchen application. Outdoor-rated built-in grills, side burners, refrigerators, and sinks are all widely available and designed to handle the full range of outdoor weather conditions.
How long does it take to build a basic DIY outdoor kitchen?
A basic DIY outdoor kitchen consisting of a concrete block frame with a tile countertop and a built-in grill station, without utility connections, can typically be completed in two to three weekends by a competent DIYer working with a helper. Adding a sink, electrical connections, or a pizza oven extends the project timeline significantly depending on the complexity of the utility work involved.
What is the most important thing to get right in a DIY outdoor kitchen?
The layout and utility planning are the two most critical elements. A kitchen with a perfectly executed structure but a poorly thought through layout, where the cooking zone faces away from guests, or where there is no prep space, or where the sink is on the wrong side of the grill, will frustrate you every time you use it. Get the layout right on paper before you build a single block and run every utility before the structure is built around it.